How to Organize Your Fly Tying Desk

Fly tying is a rewarding and intricate craft, but it can quickly become overwhelming if your workspace is disorganized. A well-organized fly tying desk not only enhances your efficiency but also increases your creativity and enjoyment of the process. Let’s dive into the nitty-gritty of how to keep your fly tying desk in top-notch condition, ensuring every tool and material is within reach when inspiration strikes.
Why Organize Your Fly Tying Desk?

Ever found yourself fumbling for a hackle or searching endlessly for that perfect shade of dubbing? Organization is key to a smooth fly tying session. A cluttered desk can lead to frustration, wasted time, and even lost materials. By maintaining a tidy workspace, you ensure that every minute spent tying is productive and enjoyable.
Getting Started: Assess Your Current Setup
Before diving into new organizational systems, take a good look at your current setup. What’s working? What isn’t? Identifying the pain points in your current organization will help you address them more effectively.
Ask Yourself:
Are your tools easily accessible?
Can you quickly find the materials you need?
Is your desk space adequate for your tying needs?
Essential Tools for an Organized Fly Tying Desk
Before we delve into organization tips, let’s ensure you have the right tools to keep your desk orderly.
Tool Caddy: A tool caddy is indispensable for keeping your essential tools like scissors, bobbins, and hackle pliers in one place.
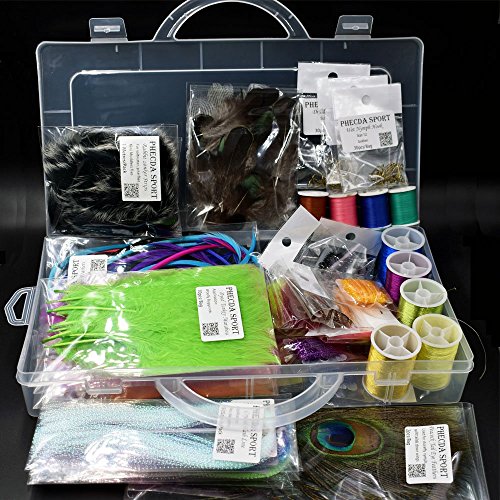
Storage Bins: Clear storage bins of various sizes are great for categorizing and storing materials. Transparent bins help you see what’s inside without having to open each one.
Drawer Dividers: These help in segregating different materials within a single drawer, making it easier to find what you need quickly.
Pegboard: A pegboard mounted on the wall above your desk can hold tools, materials, and even completed flies.

Step-by-Step Guide to Organizing Your Fly Tying Desk
1. Declutter Your Space
Clear the clutter before you start organizing. Remove everything from your desk and sort through your materials. Discard anything that’s damaged or no longer useful.
Pro Tip: If you haven't used a material or tool in the past year, consider donating it to a fellow fly tyer or a local fishing club.
2. Categorize Your Materials
Group similar items together. Common categories include:
Hooks: Keep hooks of different sizes and types in labeled containers.
Thread: Arrange threads by color and type in a thread organizer.
Feathers and Furs: Store these in clear plastic bags or containers, labeled by type and color.
Dubbing: Keep dubbing materials in a compartmentalized box for easy access.
Ask Yourself: How often do I use each category of material? Place frequently used items within easy reach and store less frequently used items in a nearby drawer or shelf.
3. Create a Logical Layout
Arrange your desk so that the most used tools and materials are within arm’s reach. A well-thought-out layout saves time and reduces frustration.
Example Layout:
Center: Place your vise and essential tools directly in front of you.
Left Side: Store materials you use regularly in bins or drawers.
Right Side: Keep a tool caddy with scissors, bobbins, and other frequently used tools.
4. Use Vertical Space
Don’t forget about the space above your desk. A pegboard can be a game-changer, allowing you to hang tools and materials in an organized and visible manner.
Pro Tip: Use hooks, shelves, and baskets on the pegboard to maximize storage options.
5. Label Everything
Labels are your best friends when it comes to organization. Clearly label all containers and drawers. This not only helps you find what you need quickly but also makes it easier to put things back in their rightful place.
6. Maintain Your Organization
The key to a consistently organized desk is maintenance. Spend a few minutes at the end of each tying session to put everything back in its place. Regularly review and adjust your setup as needed.
Tips and Tricks from Experienced Fly Tyers
We’ve gathered some tried-and-true tips from seasoned fly tyers to help you keep your desk in tip-top shape:
Use a Bobbin Tree: A bobbin tree keeps multiple bobbins handy and prevents them from tangling.
Magnets for Small Tools: Attach small magnets to your desk to hold metal tools like scissors and tweezers.
Velcro Strips: Use Velcro strips to secure tools to the side of your desk or pegboard.
Recycle Jars and Containers: Glass jars and plastic containers can be repurposed to store beads, hooks, and other small materials.

FAQs about Organizing Your Fly Tying Desk
How often should I reorganize my fly tying desk?
It depends on how often you tie flies. A good rule of thumb is to reorganize every few months or whenever you notice your desk becoming cluttered.
What’s the best way to store feathers?
Store feathers in clear plastic bags or containers to keep them clean and visible. Label each bag with the type and color of feathers.
How can I prevent my desk from becoming cluttered?
Regular maintenance is key. Take a few minutes after each tying session to put everything back in its place. Also, periodically review your materials and discard or donate items you no longer need.
What if I have a small workspace?
Utilize vertical space with pegboards and shelves. Use multi-functional storage solutions like a tool caddy with compartments and stackable bins.
Are there any tools specifically for organizing fly tying materials?
Yes, there are several tools designed for this purpose, including bobbin trees, thread organizers, and compartmentalized storage boxes.
How can I make my fly tying desk more efficient?
Keep frequently used tools and materials within arm’s reach. Use labels to quickly identify materials. Regularly declutter and reorganize to maintain efficiency.
Conclusion
Organizing your fly tying desk is an ongoing process that pays off in spades. A well-organized workspace not only enhances your efficiency but also boosts your creativity and enjoyment of the craft. By following the tips and strategies outlined in this article, you’ll be well on your way to creating a tidy, functional, and inspiring fly tying desk.
// Related Posts About Fly Fishing